
Laser-Engraved Wood
This was practically my first time engraving with the laser cutter so it took a few tests to develop a process that worked with Faryn‘s mostly landscape, tree-centric (in the best way possible) photographs.
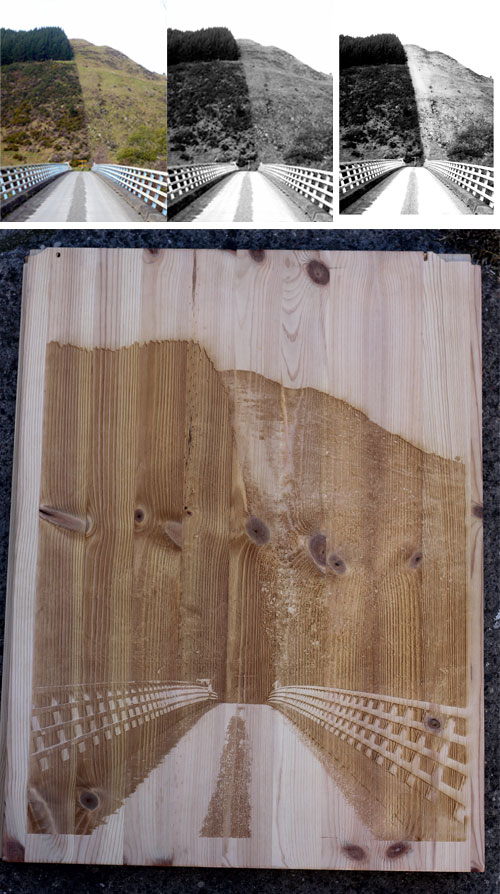
Editing the Photograph
I opened the digital photograph in Photoshop, desaturated it (because it’s easier to see what the laser cutter will engrave) and increased the contrast. For some photographs I went in and manually tweaked the contrast of certain areas with the burn and dodge tools so that the final engraving would capture the details of what made the photo so interesting.
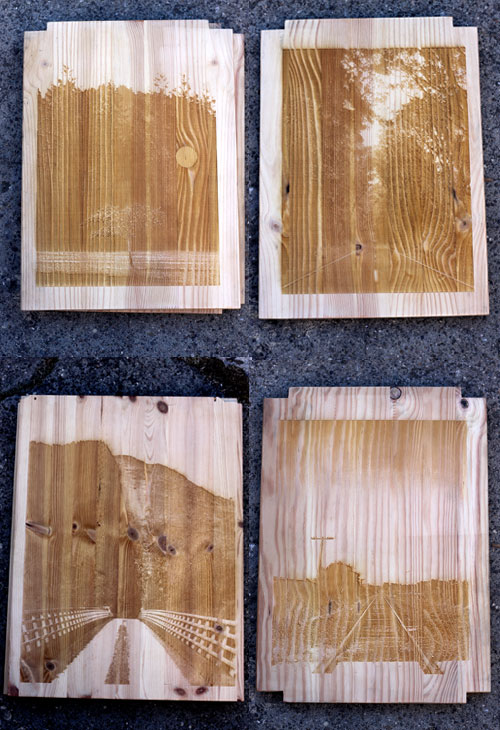
Choosing Wood
One of the most surprising elements in the process was how different species of wood reacted to the lasers. For example, some pieces (pine wood) I engraved looked like true engravings with depth and color variation. Other pieces (that might have been oak?) looked like the image had been seared or burned in and much more like prints than the soft-wood pieces. I assume this is related to how tight the grain of the wood is, but I haven’t done enough testing to say for sure. It could also be related to how dry and/or old the wood is. (If anyone knows I’d love to hear from them).
Faryn went to Urban Ore to pick out wood, it’s inexpensive and and has the added bonus of being recycled/upcycled. She happened to choose the broken down remains of some unknown Ikea furniture which I thought, Ikea furniture being some of the most disposable wood we have, was particularly serendipitous choice of wood on which to engrave images of trees.
I sanded the wood with a palm sander then wiped clean before sticking it in the laser cutter.
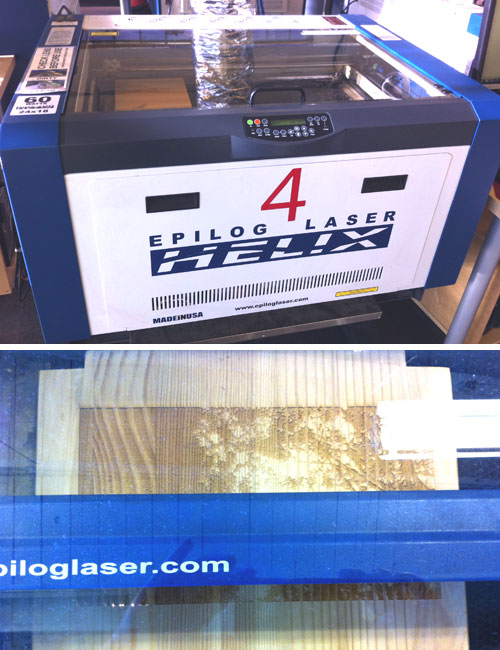
Laser-ing!
(Prepare yourself for jargon).
I did a few tests with one of the photos to hone in on the best settings for the Epilog 60 Watt Laser Cutter I used at TechShop. For the soft pine I used 80 Speed/90 Power at 600 DPI with the “Jarvis” dithering pattern (which I chose because it looked the least digital and most organic of all the options). Smaller (11×16-ish) pieces took anywhere from 40-60 minutes depending on how dense the photo was. White space isn’t engraved, so the less white space the quicker the engraving. Some of the larger pieces (16×22-ish) took upwards of an hour and a half.
Finishing!
Once engraved, some of the pieces needed sanding to reveal the details that were engraved but lost because of the slight burn coloration. I delicately sanded to increase the contrast of the relief.
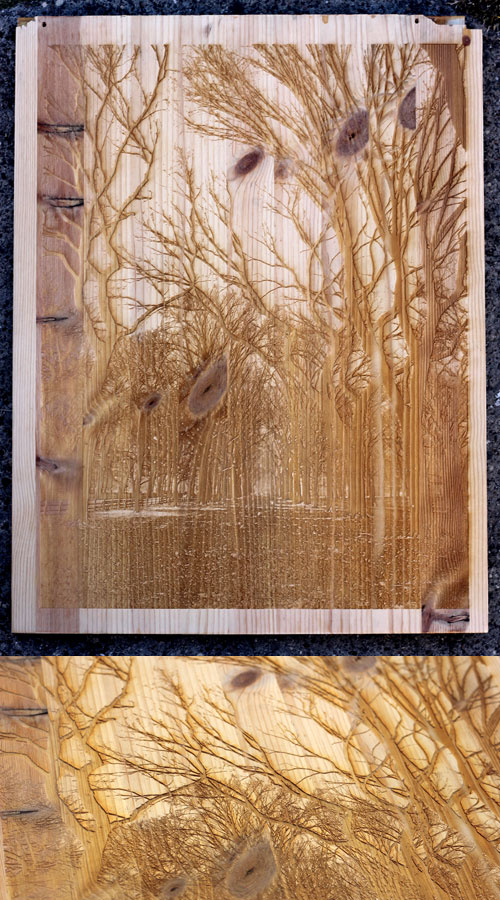
This last engraving of ‘Snow Trees’ in Central Park was a crowd favorite. The detail below shows the depth variation we were able to achieve.
Faryn’s photographs and engravings are coming down soon and the pieces that weren’t snapped up will be available for sale. I’ll be sure to announce as soon as they’re available!
